| Step by step details First,
create the images you want with MRIcro. You
probably want to read my MRIcro
rendering page. You will want to save one
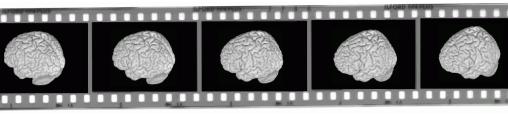
picture for each frame of your movie. I find that
saving one frame each 15-degrees (e.g. 24 images
for a full 360-degree spin) leads to a fluid
movie that does not take too long to download.
For each frame, choose 'Save as picture...' from
MRIcro's 'File' menu. The end result should be 24
images, with names like 'file000.png,
file015.png, file030.png,...file345.png'. Make
sure to save each image as .PNG format: if you
save the images as JPEG format, the movie will
end up taking longer to download and will not
look as sharp.
Second, start IrfanView and choose 'Batch
conversion' from the 'File' menu. You will want
to find the folder with your PNG images and press
the 'Add all' button. The 'Input files' list
should now show all your images. For the 'Output
format', select 'GIF' and then press the 'Start'
button. A set of GIF format images will be saved
to the 'Output directory'. At the end of this
step, you should have a series of GIF images, for
example: 'file000.gif, file015.gif,
file030.gif,...file345.gif'.
Finally, start Microsoft GIF Animator. Drag
and drop each image to the panel on the left
side. You want to do this in the order you want
you images to appear in the movie. Once you have
loaded all your images, click on the 'Select all'
button (this looks like 3 boxes). Next, click on
the 'Animation' tab and check the 'Looping' and
'Repeat forever' checkboxes. Then click on the
'Image' tab and set the duration to 10, and make
sure the transparency is not
checked. Now press the 'Save' button (floppy
disk) to save your rotating GIF.
|
 |